
File Watcher
The File Watcher section brings instrument result files straight into an experiment. When an instrument saves a file, for example an HPLC run export, the Scifeon File Hub uploads it and the file shows up in the File Watcher section right away. With one click you copy the data into a spreadsheet section of the step, or process it with the Data Loader. Nobody has to find, download or upload the file by hand.
Before you start
Section titled “Before you start”The File Watcher can only monitor an instrument when a File Hub sends that instrument’s files to Scifeon. This is a one-time setup per instrument, usually done by an administrator:
- Install the File Hub on the lab PC the instrument saves its files to.
- Add a FileAgent that watches the instrument’s folder.
In Scifeon, the FileAgent appears as a Hub Device of type FileAgent, named after the PC and the FileAgent, for example
LAB-PC-01-HPLC-01. - Link the FileAgent to the instrument, as described below.
Link a FileAgent to an instrument
Section titled “Link a FileAgent to an instrument”- Go to Browse Data, click Hub Device and open the FileAgent.
- Under Manage Device, select the instrument in the Instrument field.
- Click Save.
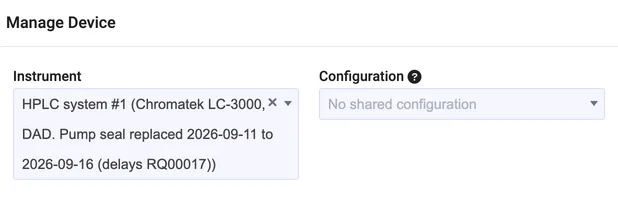
The instrument can now be selected in File Watcher sections.
The same card has the FileAgent’s detection and retention settings:
| Setting | What it does |
|---|---|
| Include patterns | Only files matching these patterns are uploaded, for example *.csv. Leave it empty to upload every file. |
| Ignore patterns | Files matching these patterns are never uploaded, for example temporary files such as *.tmp. |
| Settle time | How long, in milliseconds, a file must stay unchanged before it is uploaded. This makes sure the instrument has finished writing it. |
| Rescan interval | How often, in seconds, the File Hub checks the folder for files it may have missed. |
| After upload | Whether the File Hub leaves the original file in place, moves it to an uploaded subfolder or deletes it. |
| Retention | How many days moved files are kept in the uploaded subfolder. |
The File Hub picks up changed settings the next time it uploads a file, when it restarts, or when someone clicks Refresh config on its configuration page.
Add a File Watcher section
Section titled “Add a File Watcher section”-
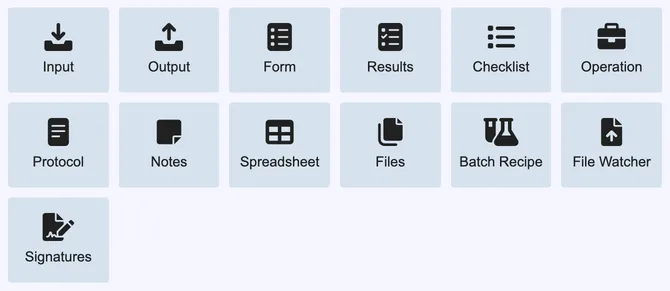
In the step, click + Section and choose File Watcher.
-
Under Monitored instruments, select one or more instruments. Only instruments that are linked to a FileAgent are listed.
-
Under Action, choose what happens when you apply a file:
- Apply to a spreadsheet section: the data in the file is written into a spreadsheet section of the same step. Select the Section, the Sheet and the top-left Cell to write to. The step needs a spreadsheet section for this option, so add one first.
- Run the Data Loader: the file is processed by the Data Loader, the same way as when you upload a file to the step yourself.
-
Click Save.
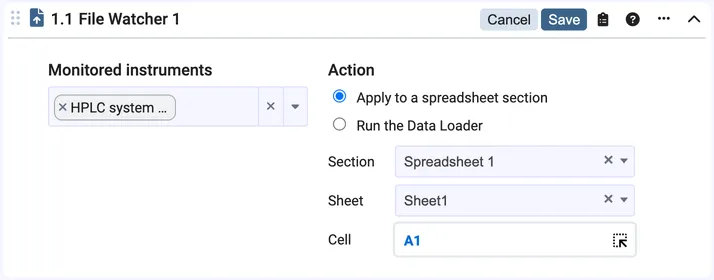
To change the configuration later, click Edit in the section header.
Apply a file
Section titled “Apply a file”Files from the monitored instruments appear in the section as soon as the File Hub has uploaded them. You do not have to reload the page. The section shows the files uploaded today; click Load all unused files from these instruments to also see older files that have not been applied yet.
For each file, you can:
- Click the magnifying glass to preview the file.
- Click the download icon to download it.
- Click Apply to process it with the configured action.
With Apply to a spreadsheet section, the data is written into the spreadsheet, starting at the configured cell. Formulas elsewhere in the sheet can then use the data. In the example below, cell H2 shows the main peak from the HPLC run.
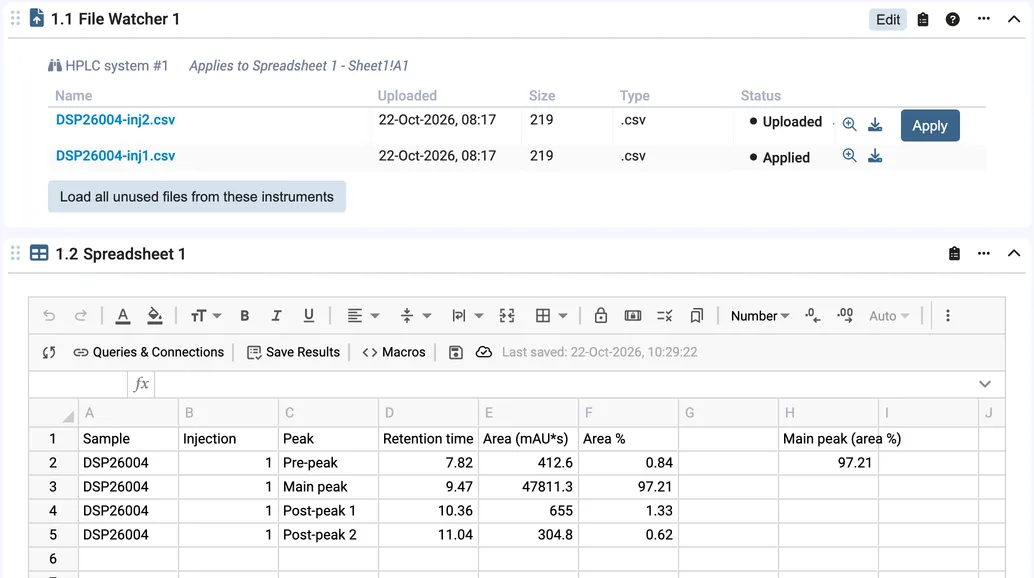
When you apply another file to the same spreadsheet, its data replaces the data of the previous file.
With Run the Data Loader, the Data Loader dialog opens with the file already selected. Complete the dialog as usual. The file is then attached to the step.
Applied files
Section titled “Applied files”An applied file gets the status Applied. It stays listed in the section where it was applied, so you can always see which file the data came from. It disappears from every other File Watcher section, so the same instrument file is not used in two experiments by mistake.
Supported files for Apply to a spreadsheet section are Excel workbooks, where the first sheet is used, and text files such as CSV. Images and PDF files cannot be applied to a spreadsheet.